For each environment, a list of modules have been enabled. To configure your modules access the module management by clicking the module management icon in the main administrator screen.

The number on top of the icon indicates the number of modules that have been enabled for the environment.

In the module management screen, you can use the search function (using the icon at the top-right corner) to quickly find your module.
Change module parameters
Open the module parameters by opening the module drawer with the down arrow at the right of each module row.

You can change the description of the module by clicking on the module name (Inventory Management in the above example). In the list of parameters, you can manipulate the Value in the value column to ensure the module has the right parameter value for your setup.
The parameters can be reset to a factory default using the reset icon.

Be cautious to use the reset button, it will reset all the parameters for your module to factory default.
Module Variants
It is possible to copy existing modules into new versions; called variants.

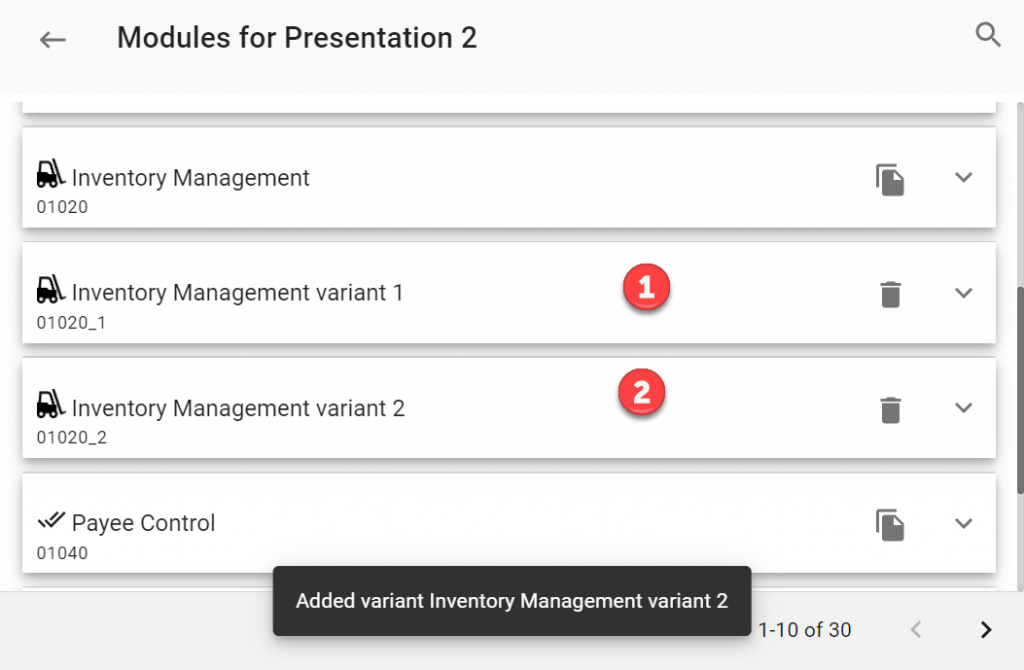
Click the variants button in the module screen to copy a module into a variant. A dialogue will ask for confirmation that can be either confirmed using the OK button or ignored by clicking anywhere else in the screen.

In this example, two variants have been added to the Inventory Management App. These can both have their own set of parameters and will act much like JDEdwards versions.
Module variants can be deleted by using the recycle bin icon at the end of each module row.
Module Visibility Management
Access to functionality is entirely managed by your back end ERP system. However, in Appshare the administrator can manage what users or roles will see what modules in their Appshare session.
Click the access icon in the module configuration screen to access the Access Management Screen.

Access is governed by one Access List which is shown in this screen. An Access List can be a Deny or Grant type. Default setup is to have empty Deny Access Lists, which results into the module being available to all users.

Click the Red Shield to toggle the List type from Deny to Grant type.
List Maintenance
The list can be maintained by either entering usernames or roles into the list manually. Alternatively, you can click the list icon at the end of the line to access existing JDEdwards users and roles.

In the User and Role selection screen you can toggle User ID’s and Roles that are automatically loaded from your back end JDEdwards system to be part of your list or not.
Use the selection buttons at the header of your screen to make your selection easier. Click the save button to load the selected IDs or Roles into your Access list.

In this example, the selected three roles are denied access to this module (and everybody else will have access).
Remember that you can revert this into a Grant list by clicking the Shield button:

Now the three roles are the only roles that will have access to this module.
