Appshare PWA can be hosted on a private node (Cloud or Local Node). This has some benefits over the Public SaaS hosting of Appshare
- As customer, you can decide when to move to the next release of Appshare.
- A private node knows the customer account and can use node profiles to configure servers and Single Sign On
The login screen of.a private node uses identity providers and node profiles to enable or disable options for users An Identity provider is used to authenticate a user. Two types are supported: username/password and OpenID. Without any identity provider configured the default is username/password A node profile combines a server with identity providers to suggest login options for a user
Pre-fill server through a node profile
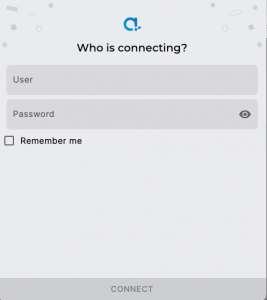
A simple use case for node profiles is to pre-fill and hide the server field from the login form. By adding a single identity provider and single node profile the login screen uses that information to fill the server instead of asking the user to fill it in.
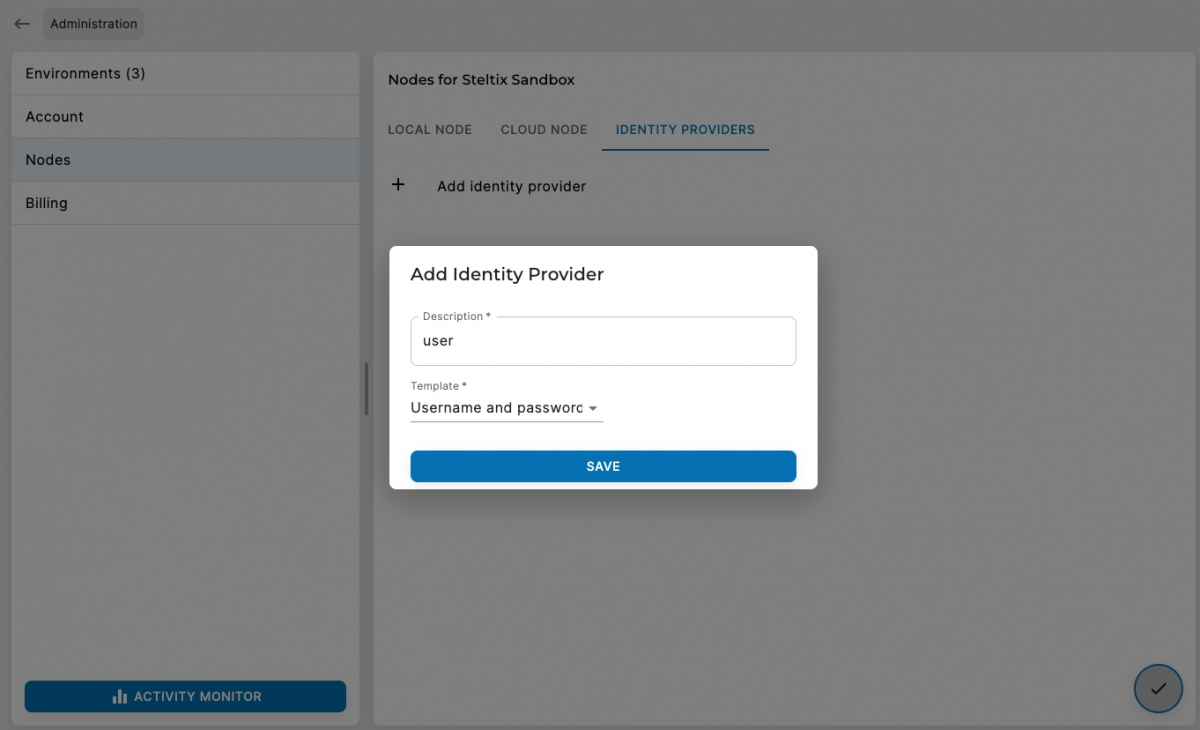
- Go to the administration
- open the nodes section
- open the identity providers
- Edit the providers
- Add a provider.
- fill in ‘user’ as name
- Select ‘Username and password’ template
- Save the provider
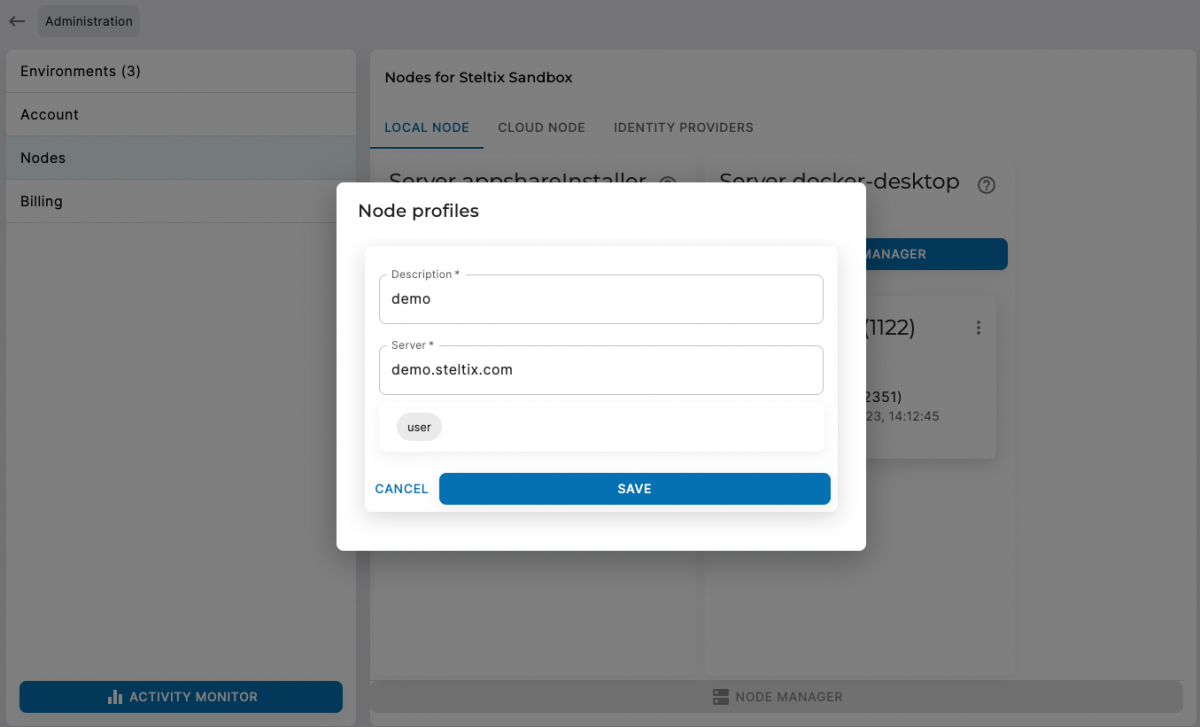
- Open the local nodes or cloud node section
- Choose in the menu of a node for ‘profiles’
- Add a profile
- Give a description
- Enter server address
- Select the ‘user’ identity provider to be active
- Save the profile
With the above setup the login screen of the private node will only show a username and password field
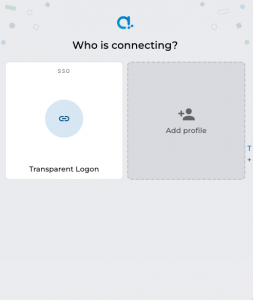
Single Sign On
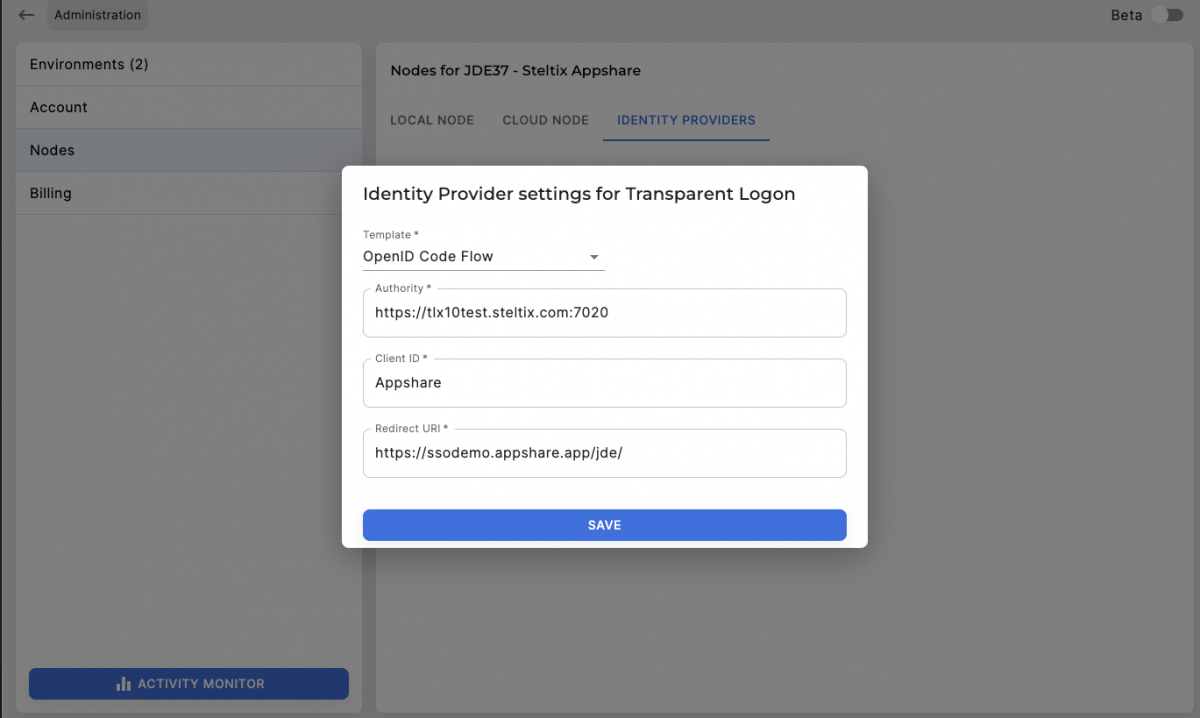
Appshare supports Single Sign On through OpenID Connect. Many external identity providers support this. To use this feature the external identity provider must setup an OAuth application which Appshare can use to authenticate with. How to setup this OAuth application is out of scope of this document.
- Go to the administration
- open the nodes section
- open the identity providers
- Edit the providers
- Add a provider.
- fill in a name
- Select ‘OpenID Code Flow’ template
- Fill in the issuer url from the OAuth application in the authority field
- Fill in the client-id from the OAuth application
- Optionally, fill in the url to redirect back to after authentication
- Save the provider
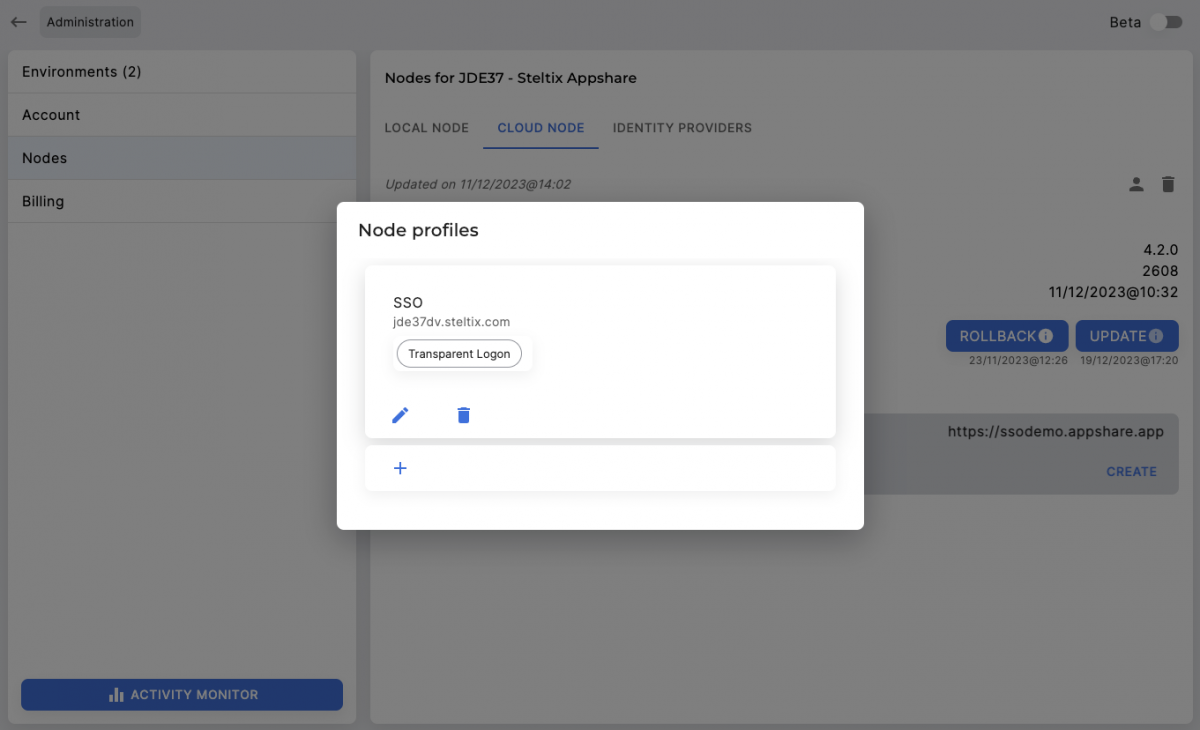
- Open the local nodes or cloud node section
- Choose in the menu of a node for ‘profiles’
- Add a profile
- Give a description
- Enter server address
- Select the identity providers to be active
- Save the profile
With the above setup the login screen of the private node will show a login profile which will authenticate with OpenID and connect with the AIS server through a JWT token.