The authentication tab contains settings associated with the authentication type choosen.
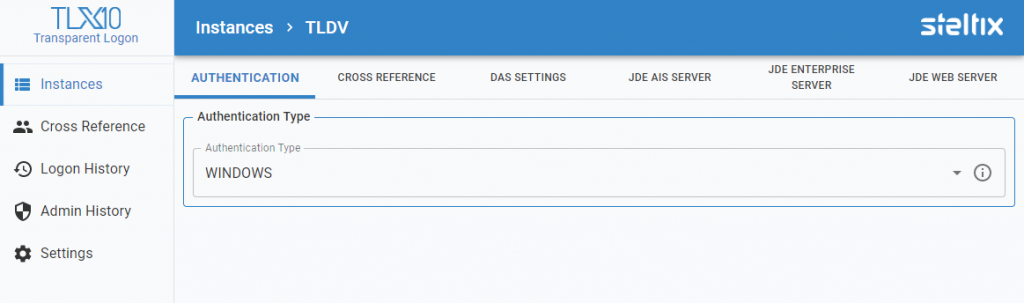
Authentication Type
Select your authentication type from the drop down list.
When using Windows authentication, no further parameters are required. When using SAML2 authentication, more information is required, depending on the SAML2 provider you use.
SAML2 Authentication Type
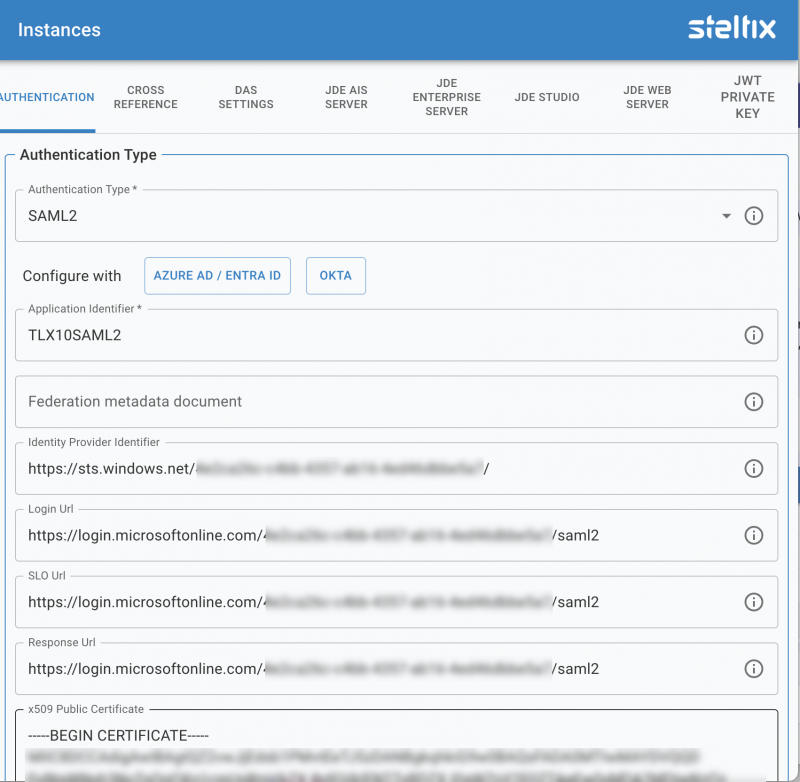
Office 365 SAML2 authentication parameters example
Configuration Wizard
Use the Azure AD / Extra ID button or Okta button to start the wizard to complete the required configuration. Once the wizard completes the following fields wil have been completed:
Application Identifier
Copy and paste your identifier from you SAML2 provider. This might be called the Service Entity ID
Identity Provider Identifier
Copy and paste your identifier from your SAML2 provider. This might be called the Provider Entity ID
Login URL
Copy and paste the login URL of your SAML2 provider.
SLO URL
Copy and paste the logout URL from your SAML2 provider.
Response URL
Copy and Paste the logout URL from your SAML2 provider.
X509 Public Certificate
Download or copy and paste you X509 certificate from your SAML2 provider.
Enable Microsoft Authenticator
When you enable Windows Authenticator, you can logon to JD Edwards through Transparent Logon without any password.
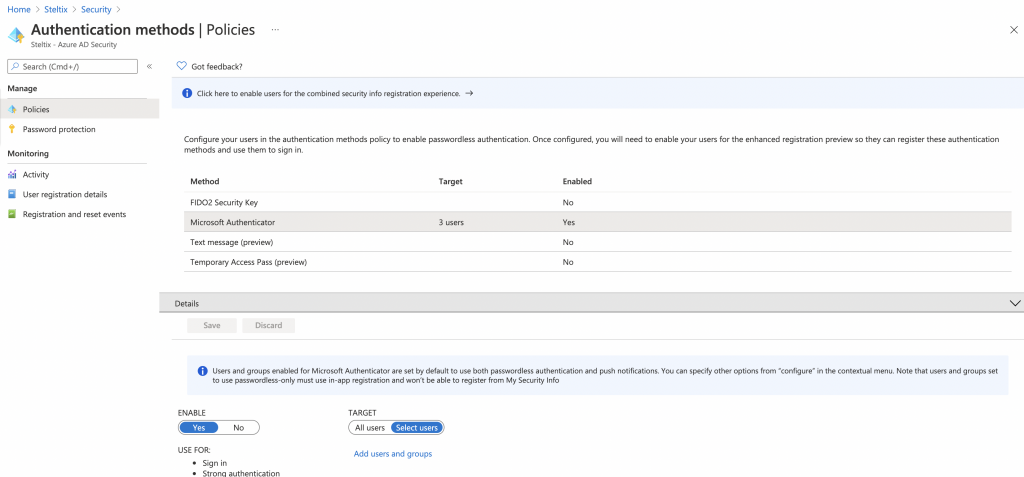
In your Azure security settings, enable the Microsoft Authenticator as indicated above.
Using the Authenticator
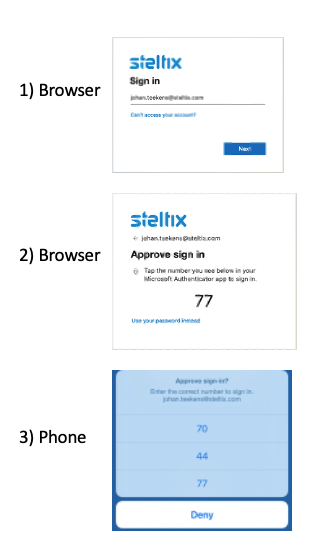
After navigating to your Transparent Logon URL, office 365 will show a random number. On your phone, Microsoft Authenticator will notify you and show multiple numbers. Confirm the number shown in your browser to gain access.
OAuth / OpenID
When selecting Oauth, complete the following fields: OAuth providers usually have a metadata document or url which contains the necessary details
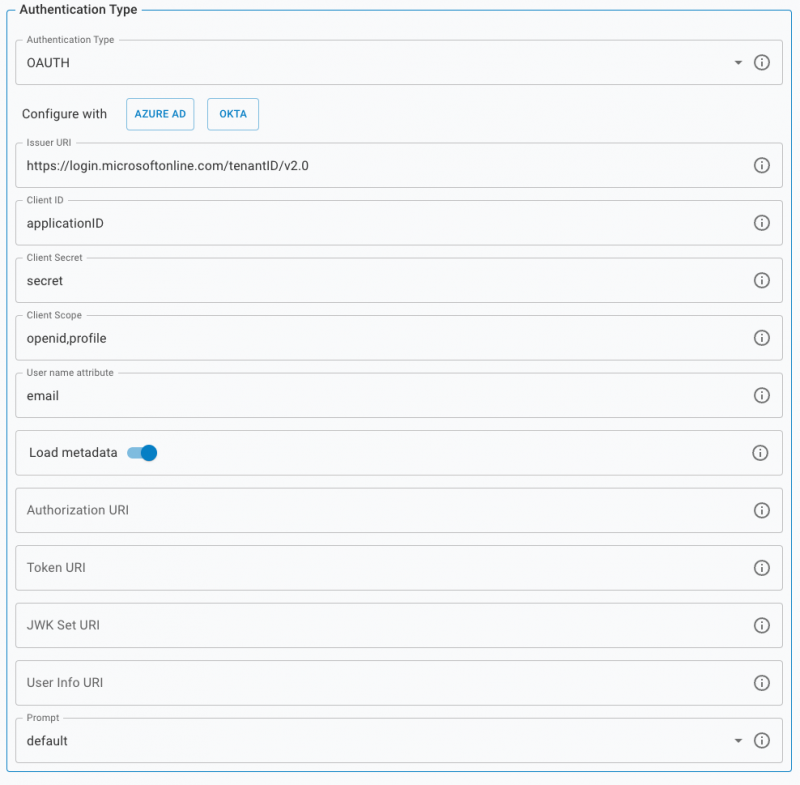
Configuration Wizard
Use the Azure / Entra ID or Okta buttons to start the Wizard to complete the configuration.
Issuer URI
Copy and paste your issuer from your OAuth2 application
Client ID
Copy and paste your client / application id from your OAuth2 application
Client Secret
Copy and paste your client secret from your OAuth2 application
Client Scope
These are the scopes used when requesting token. A scope exposes claims/attributes which can be used for the username
User name attribute
The attributes from the user information or token to use as username,
Load metadata
Load all OAuth settings from the provider by downloading the metadata document based on the Issuer URI
Authorization URI
Token URI
This is the endpoint where the tokens are requested from after the user has authorized the request
JWK Set URI
This is the endpoint with public signing keys of the tokens. third parties can verify the tokens with these keys
User info URI
This is the endpoint with user profile information
Prompt
Based on the selection the user will be prompted for authentication or account selection
.